Color Chevy Brake Light Switch Wiring (Guide) of 2024
In the realm of automotive engineering, the intricacies of wiring play a crucial role in ensuring the safety and functionality of various components, including brake lights.
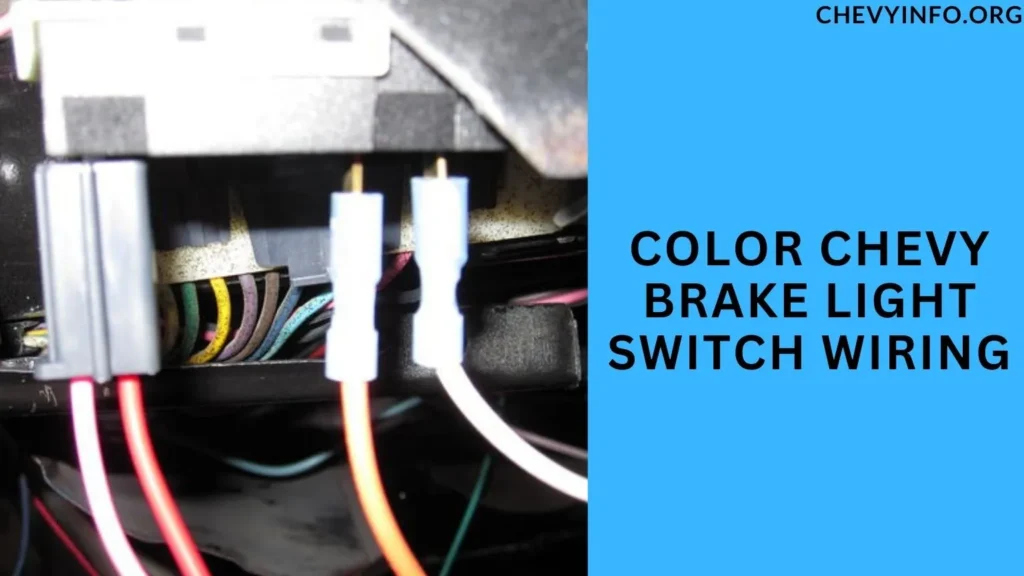
Color Chevy Brake Light Switch Wiring, One of the key elements in this system is the brake light switch, which, when wired correctly, ensures that the brake lights illuminate promptly when you press the brake pedal.
Color Chevy Brake Light Switch Wiring
Brake light switches are fundamental components of a vehicle’s electrical system. They are responsible for activating the brake lights when the brake pedal is pressed, alerting drivers behind you of your intention to slow down or stop.
Understanding the wiring associated with these switches is vital for maintaining safety on the road.
Understanding Color Codes
In the world of electrical wiring, color codes serve as a universal language that helps technicians and enthusiasts alike identify different wires and their functions.
For instance, in many wiring diagrams, red often signifies power or positive terminals, while black indicates ground or negative connections.
It’s crucial to grasp these color codes to avoid confusion and ensure proper connections.
Chevy Brake Light Switch Wiring
When it comes to Chevy vehicles, understanding the specific color codes used in brake light switch wiring is essential.
While the exact colors may vary depending on the model and year, common colors like red, black, white, and green are typically encountered.
These colors correspond to specific functions within the wiring system, such as power, ground, signal, and auxiliary functions.
Safety and Functionality
Proper wiring is not just about functionality but also about safety. Faulty or incorrectly wired brake light switches can lead to malfunctions, such as lights not illuminating or staying on continuously.
This not only compromises your safety on the road but also poses a hazard to other drivers. Ensuring that wiring is correctly installed and maintained is paramount.
Troubleshooting Wiring Issues
Troubleshooting wiring issues can be a daunting task, but with a methodical approach and the right tools, you can identify and resolve common problems.
Here are some steps to help you troubleshoot wiring issues effectively:
Visual Inspection
Start by visually inspecting the wiring harness for any signs of damage, such as frayed wires, exposed insulation, or corrosion. Look for areas where wires may be pinched or crushed, as this can cause connectivity issues.
Check Connections
Ensure that all connections are secure and free from corrosion. Loose or improperly connected wires can cause intermittent electrical problems.
Tighten any loose connections and clean corroded terminals using a wire brush and electrical contact cleaner.
Use a Multimeter
A multimeter is a handy tool for testing continuity, voltage, and resistance in electrical circuits. Use it to check for continuity along wires and connections to ensure there are no breaks or open circuits. Test voltage levels to verify that power is reaching the intended components.
Follow Wiring Diagrams
Refer to wiring diagrams specific to your vehicle model to identify the correct wiring configuration.
These diagrams outline the color codes, wire paths, and connection points, making it easier to trace and troubleshoot wiring issues accurately.
Test Components
If you suspect a specific component is causing the wiring problem, such as a faulty brake light switch, test it using the appropriate testing procedures outlined in the vehicle’s service manual. Replace any malfunctioning components as needed.
Inspect Fuse Box
Check the fuse box for blown fuses that may be causing electrical issues. Replace any blown fuses with ones of the same amperage rating.
Keep in mind that a blown fuse is often a symptom of an underlying wiring problem, so thorough troubleshooting is crucial.
Perform Voltage Drop Tests
Voltage drop tests can help identify high-resistance connections or wiring faults. Use a voltmeter to measure voltage drops across critical connections and wires,
comparing readings to specifications in the service manual. High voltage drops indicate potential issues that require further investigation.
Test Circuits Under Load
Some electrical problems may only occur when circuits are under load, such as when lights are turned on or brakes are applied.
Test circuits under load conditions to simulate real-world scenarios and identify intermittent faults that may not be apparent during static testing.
DIY Wiring Tips
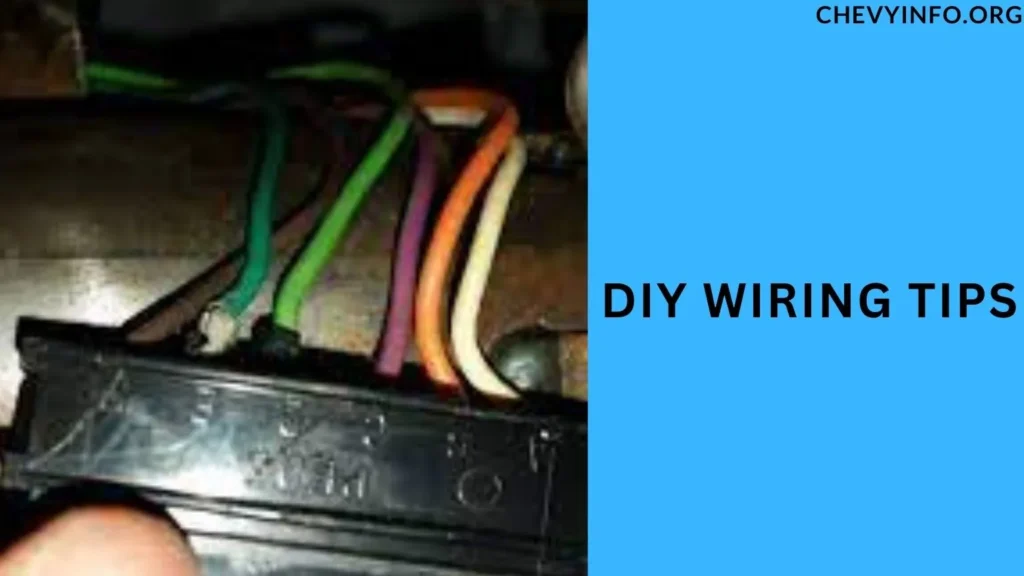
For those inclined toward DIY tasks, handling wiring can be both rewarding and challenging. It’s crucial to follow wiring diagrams meticulously, use the right tools, and prioritize safety measures like wearing insulated gloves and disconnecting the battery before starting work.
Simple tasks like replacing a brake light switch or fixing a loose connection can be tackled with care.
Here are some DIY wiring tips to help you handle electrical tasks safely and effectively:
Educate Yourself
Before diving into any wiring project, take the time to educate yourself about electrical systems, safety practices, and local building codes.
Understand the basics of wiring diagrams, wire gauges, and color codes to work confidently and avoid costly mistakes.
Use the Right Tools
Having the right tools is crucial for a successful wiring project. Invest in quality tools such as wire strippers, crimping tools, multimeters, and insulated gloves. Using the correct tools not only makes the job easier but also ensures safety.
Plan and Diagram
Plan your wiring layout and create a detailed diagram before starting any work. Identify the location of outlets, switches, and appliances to determine the best wiring routes. Label wires and components in your diagram for easy reference during installation.
Turn Off Power
Safety should always be a priority. Before working on any electrical circuit, turn off the power at the circuit breaker or fuse box. Use a voltage tester to double-check that the circuit is de-energized before touching any wires.
Use Proper Wiring Techniques
Follow best practices for wiring, such as using wire nuts or crimp connectors to secure connections,
routing wires away from heat sources or sharp edges, and securing cables with cable ties or clips. Avoid overloading circuits and use the correct wire gauge for the intended application.
Test Connections
After making connections, test them using a multimeter to ensure continuity and proper voltage levels.
Check for any loose connections or exposed wires that could cause short circuits or electrical hazards.
Practice Safety Precautions
Always wear appropriate safety gear, such as safety glasses and insulated gloves, when working with electricity.
Avoid working on wet surfaces or in damp conditions. Keep flammable materials away from electrical work areas.
Seek Professional Help if Needed
If you’re unsure about a wiring task or encounter complex issues, don’t hesitate to seek professional assistance.
Electrical work can be dangerous, and it’s better to enlist the help of a licensed electrician for complicated projects or if you’re not confident in your skills.
Professional Assistance
However, for complex wiring issues or if you’re unsure about your skills, it’s advisable to seek professional assistance.
Certified technicians have the expertise and equipment to diagnose and repair intricate wiring problems effectively.
Investing in professional wiring services not only ensures safety but also prolongs the lifespan of your vehicle’s electrical system.
People also ask
What color is brake light wire?
The brake light wire is typically red in color.
What is the green and yellow wire on the brake light?
The green and yellow wire on the brake light is commonly used for the turn signal or indicator function.
What are the colors of the wire on a light switch?
The colors of wires on a light switch can vary, but commonly, the black wire is for power, the white wire is for neutral, and the green or bare copper wire is for ground.
Does it matter which wire goes where on a light switch?
Yes, it matters which wire goes where on a light switch. The black wire typically connects to the brass screw (hot terminal),
the white wire connects to the silver screw (neutral terminal), and the green or bare copper wire connects to the green screw (ground terminal) on the light switch for proper functioning and safety.
Conclusion
In essence, understanding color-coded Chevy brake light switch wiring is essential for vehicle safety and functionality.
Whether you’re a DIY enthusiast or prefer professional assistance, ensuring that the wiring is correctly installed and maintained is paramount.
By following wiring diagrams, adhering to safety protocols, and knowing when to seek help, you can keep your brake lights shining brightly on the road.
Henry Worner, a seasoned automotive expert with over 13 years of experience in car repair, maintenance, and performance enhancement, ChevyInfo.org was born out of a passion for Chevrolet vehicles. Henry’s deep-rooted love for everything Chevy has driven him to create a platform where fellow enthusiasts, car owners, and anyone interested in Chevy cars can find valuable insights, tips, and guidance.